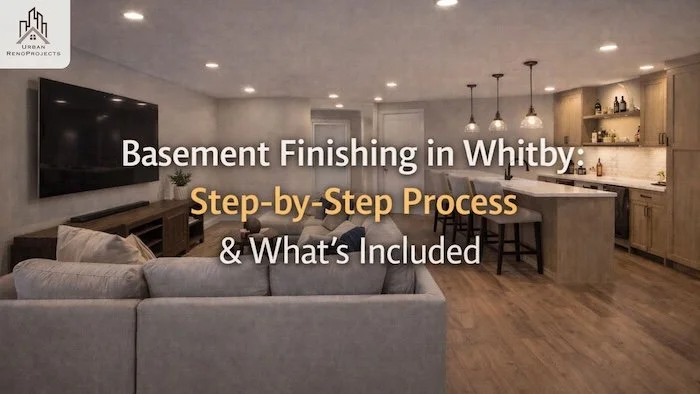
Basement Finishing in Whitby: Step-by-Step Process & What's Included
Quick Answer: Finishing a basement in Whitby follows 8 defined stages: site assessment → design & permit → pre-construction → framing → rough-in trades → insulation & drywall → flooring & finishing → inspection & handover. From first consultation to move-in-ready, most Whitby basement projects take 8–14 weeks, including permit approval. Urban RenoProjects manages every stage; you have one point of contact throughout.
Table of Contents
Why "Finishing" a Basement Is Different From Just Renovating It
A lot of homeowners use the words interchangeably. But they mean different things, and understanding the difference changes how you budget and plan.
Basement renovation refers to updating or changing a space that's already partially finished. New flooring, a refreshed bathroom, and new lighting. This is renovation work.
Basement finishing means taking an unfinished or semi-finished basement, typically with bare concrete walls, exposed joists, and raw mechanicals and converting it into a fully livable, code-compliant space.
Finishing is a bigger undertaking. It involves almost every trade: framing, electrical, plumbing, HVAC, insulation, drywall, flooring, and finishing carpentry. It requires a building permit in Whitby and most Durham Region municipalities. And it needs to be done in the right sequence because covered work that hasn't been inspected may need to be torn open again.
Most Whitby homes built between 1980 and 2005 have basements that are unfinished or only partially finished. The concrete foundation is sound, the ceiling height is workable, and the space is ready to go. That's the ideal starting point.
What's Included in a Complete Basement Finish?
A full basement finish in Whitby covers every element needed to turn raw space into a room you'd actually want to spend time in.
| Element | What It Involves |
|---|---|
| Moisture assessment | Checking for water ingress, cracks, and humidity issues before any work starts |
| Framing | Wood stud walls create all rooms, bulkheads covering mechanicals |
| Electrical rough-in | Wiring runs, outlet boxes, and panel connections before drywall goes up |
| Plumbing rough-in | Drain and supply lines for any bathroom or wet bar (requires concrete cutting if no existing rough-ins) |
| HVAC / ventilation | Extending ductwork, adding returns, or installing an independent system |
| Insulation & vapour barrier | Batt or spray foam insulation in all exterior walls; vapour barrier before drywall |
| Drywall | Hang, tape, mud, and sand, with a minimum of two coats of compound |
| Flooring | Subfloor installation + finished floor (LVP, laminate, tile, or carpet) |
| Bathroom | Full 3-piece or 4-piece installation if included in scope |
| Trim, doors & paint | Baseboards, door casings, interior doors, and final paint |
| Lighting & fixtures | Pot light installation, switches, and any feature lighting |
| Permits & inspections | Building permit + ESA electrical inspection at required stages |
Every legitimate basement finishing quote should include all of these. If a quote leaves out permits, demo disposal, or trade inspections, ask specifically why.
The 8-Stage Basement Finishing Process
This is the sequence every well-run basement finishing project follows. Order matters. Skipping stages or doing them out of sequence causes rework, failed inspections, and delays.
Stage 1: Discovery & Site Assessment
Before any drawings are produced, an experienced basement finishing contractor in Whitby should assess the space in person. This means:
Measuring the basement precisely (not estimating)
Checking ceiling height at the tightest points under beams, ducts, and drop ceilings
Looking for moisture, efflorescence, or cracks that need to be addressed first
Confirming the electrical panel has capacity for the added load
Assessing existing plumbing rough-ins if a bathroom is planned
This stage takes one visit. It costs you nothing. But it determines the accuracy of everything that follows.
If moisture issues exist, they must be resolved before finishing begins. Finishing over a damp basement doesn't solve the problem; it hides it until it destroys your investment.
Stage 2: Design & Fixed-Price Quote
Once the site is assessed, your contractor develops the layout and provides a detailed, written quote.
A proper basement design for a Whitby home covers:
Room layout and dimensions
Bathroom location and specifications
Electrical plan (outlet locations, lighting layout, panel requirements)
Plumbing plan, if applicable
Material specifications: flooring type, drywall grade, insulation type
The quote should be fixed-price, not a range, not an estimate. Every line item is included, nothing hidden.
At Urban RenoProjects, you see the full plan and the locked-in price before a permit application is submitted. No surprises after you sign.
Stage 3: Permit Application & Approval
A building permit is required for basement finishing in Whitby when work includes framing, electrical, plumbing, insulation, or any change to the building's structure. That covers virtually all full basement finishes.
Your basement finishing contractor handles this. They prepare permit drawings, submit the application to the Town of Whitby Building Department, and track approval. You do not deal with the building department directly.
Permit approval in Whitby typically takes 3–5 weeks. Plan for this in your timeline. Construction cannot begin on permitted work until the permit is issued.
A separate electrical permit is filed through the Electrical Safety Authority (ESA) by your licensed electrical contractor. This runs concurrently with the building permit.
Stage 4: Pre-Construction & Site Preparation
Once permits are approved, the project is ready to start. Pre-construction includes:
Protecting the main floor from dust and foot traffic
Setting up temporary barriers between living and work areas
Ordering long-lead materials (custom windows, specialty flooring)
Scheduling all trades in the correct sequence
A clean site setup at this stage is what separates a professional operation from a chaotic one. The difference in your daily experience during a 10-week project is significant.
Stage 5: Framing & Rough-In Trades

This is where the basement takes shape. Framing comes first, all partition walls go up, bulkheads are built around mechanicals, and the skeleton of every room is defined. Then the rough-in trades work in sequence:
HVAC first ductwork has the least flexibility in routing; it goes first
Plumbing second drain lines require a specific slope; they follow the HVAC
Electrical last wiring is the most flexible; it fills in around everything else
Each trade works around the others. A project manager coordinates this sequence. Without coordination, trades conflict and conflicts cause delays.
At the end of Stage 5, the basement looks like a rough skeleton. Wires, pipes, and ducts are visible. The walls are open. This is exactly the right state for inspection.
Stage 6: Rough-In Inspections
Before anything is covered, your building inspector signs off on the rough-in work.
In Whitby, the building inspector checks:
Framing compliance with the Ontario Building Code
Insulation and vapour barrier (after insulation is installed)
Fire separation if a secondary suite is being built
The ESA inspector independently inspects the electrical rough-in.
Do not cover the walls before inspections are complete. This is the most common costly mistake in basement finishing. Covered work must be opened to be inspected, and you pay for both the drywall that came down and the drywall that goes back up.
Urban RenoProjects schedules all inspections as part of our project management. You will never be in a position where work is covered prematurely.
Stage 7: Insulation, Drywall & Finishing

Once rough-ins are inspected and approved, the space starts to look like a room.
Insulation & vapour barrier: all exterior walls and the ceiling (if sound control is needed) are insulated. The Ontario Building Code requires a minimum R-20 for basement exterior walls. R-24 to R-28 is recommended for comfort and energy efficiency.
Drywall hung, taped, and mudded. A minimum of two coats of compound, sanded smooth between coats. Moisture-resistant board is used in bathrooms and near any plumbing.
Flooring subfloor panels are installed over concrete (critical for moisture protection and comfort underfoot). Then finished flooring: luxury vinyl plank is the most popular choice in Whitby basements for its durability, warmth, and moisture resistance.
Trim, doors & paint the aseboards, door casings, interior doors, and two coats of finish paint. This is the stage where the space transforms from a construction zone into a room.
Stage 8: Final Inspection & Handover
When all finishing work is complete, the building inspector conducts a final inspection. This confirms the project meets the Ontario Building Code throughout.
The ESA issues a Certificate of Acceptance for the electrical work. Keep this document, it's'srequired for home insurance and resale.
After the final inspection, Urban RenoProjects does a joint walkthrough with you. Any deficiencies, something that doesn't meet the agreed standard, are addressed before we close the project.
You receive:
Your permit documentation package
ESA Certificate of Acceptance
Urban RenoProjects 1-year workmanship warranty
The space is yours.
Typical Timeline for Basement Finishing in Whitby
| Phase | Duration |
|---|---|
| Site assessment & quote | 1–2 weeks |
| Design finalization | 1–2 weeks |
| Permit approval (Town of Whitby) | 3–5 weeks |
| Pre-construction setup | 3–5 days |
| Framing & rough-in trades | 2–3 weeks |
| Rough-in inspections | 3–5 days per inspection |
| Insulation, drywall & finishing | 3–4 weeks |
| Flooring, trim & paint | 1–2 weeks |
| Final inspection & walkthrough | 1 week |
| Total (first contact to handover) | 10–16 weeks |
A basic basement without a bathroom runs toward the shorter end. A legal basement apartment with a full kitchen, bathroom, and separate entrance runs toward the longer end and may require additional inspections at fire separation stages.
What Happens at Each Inspection Stage
Inspections are not a formality. They are mandatory checkpoints that protect you as the homeowner.
| Inspection | What's Checked | When It Happens |
|---|---|---|
| Framing | Wall layout, header sizes, staircase compliance | After framing, before insulation |
| Insulation | R-values, vapour barrier continuity | After insulation, before drywall |
| ESA Electrical Rough-In | Wiring, outlets, panel connections | After the electrical rough-in |
| Fire Separation (legal suites only) | Type X drywall continuity, fire-rated doors | Before closing fire-rated assemblies |
| Final Building | The entire completed project | After all finishing work |
| ESA Certificate of Acceptance | Completed electrical system | At the close of the project |
All inspections in Whitby are booked through the Town of Whitby Building Department. Urban RenoProjects handles all bookings and is on-site for every inspection.

Common Mistakes Whitby Homeowners Make
These are the errors that create delays, extra costs, and headaches. All of them are avoidable.
Starting before the permit is issued. Framing before permit approval is a stop-work order waiting to happen. The time saved is never worth the risk.
Skipping the moisture check. Finishing over a damp floor or wet wall traps moisture inside your newly finished basement. Within two years, you'll be tearing it out.
Choosing carpet for the floor. Carpet absorbs moisture and grows mould in below-grade environments. LVP, laminate with a moisture barrier, or tile are the right choices for Whitby basements.
Not planning the bathroom early enough. Adding a bathroom after framing is started means cutting concrete a major extra cost. If you're considering a bathroom, it needs to be in the design from day one.
Covering the rough-ins before inspection. The most expensive mistake. An inspector who can't see the work will require it to be exposed. You pay twice for the drywall, once to put it up and once to take it down. Working with a licensed renovation contractor in Ontario helps ensure inspections are scheduled properly before any walls are closed.
What to Expect From Urban RenoProjects
Urban RenoProjects is a licensed, insured basement finishing contractor serving Whitby and Durham Region. Here's what every project with us includes:
Free site assessment and moisture check
Fixed-price written quote, no hidden extras after you sign
Permit application and management with the Town of Whitby Building Department
Dedicated project manager, one contact for the entire project
All trades are coordinated in the correct sequence
All inspections scheduled and managed by us
Clean site throughout, debris cleared daily
1-year workmanship warranty on all completed work
Frequently Asked Questions
Do I need a permit to finish my basement in Whitby?
Yes, for any work that involves framing, electrical, plumbing, insulation, or structural changes. Only cosmetic work, like painting can be done without a permit. Urban RenoProjects handles all permit applications on your behalf.
How long does basement finishing take in Whitby?
From first contact to handover, most Whitby basement finishing projects take 10–16 weeks. This includes permit approval time (3–5 weeks). Construction itself takes 6–10 weeks, depending on the scope.
Can I stay in my home while the basement is being finished?
Yes. Basement finishing rarely requires you to vacate. There will be noise and dust during working hours. Urban RenoProjects uses dust barriers and cleans the site daily to keep the impact on your main floor minimal.
What is the best flooring for a finished basement in Whitby?
Luxury vinyl plank (LVP) is the most popular and practical choice. It handles the moisture fluctuations common in Durham Region basements, it's warm underfoot, and it's durable. Laminate with a proper moisture barrier is a close second. Avoid carpet in below-grade spaces.
What's the difference between a finished basement and a legal basement apartment?
A finished basement is a livable, code-compliant space for personal use. A legal basement apartment is a fully self-contained dwelling unit with a separate entrance, kitchen, fire separation, egress windows, and municipal registration that can be legally rented to a tenant. See our legal basement apartment requirements guide for the full breakdown.
Does Urban RenoProjects finish basements in areas outside Whitby?
Yes, we serve all of Durham Region, including Oshawa, Ajax, Pickering, and Clarington, as well as the broader GTA.
Frequently Asked Renovation Questions
Ready to Start Your Basement Finishing Project in Whitby?
Every finished basement starts with a site visit. We walk through the space, check for moisture, assess your ceiling height, and give you a realistic picture of what your basement can become and what it will cost.No pressure. No obligation. Just clarity.
Book Your Free Site Assessment →
Or call us at (416) 879-8379
Written by the Urban RenoProjects Team. Licensed & Insured Basement Finishing Contractor serving Whitby, Durham Region, and the GTA. WSIB Certified. Ontario Building Code compliant.
Sources Referenced:
Ontario Building Code Part 9 Residential Insulation & Framing Requirements
Town of Whitby Building Department Permit Requirements (whitby.ca)
Electrical Safety Authority (ESA) Permit & Inspection Process
Yorkland Homes Step-By-Step Basement Renovation Process